When it comes to online shopping, first impressions happen fast — in just 50 milliseconds, according to Spencer Cobby. Poor-quality product images not only diminish the perceived value of your items but also weaken customer trust. But you don’t need a full studio setup to create professional-looking product images any more. With the right product photography setup, even a basic space can help you deliver photos that build trust, drive sales, and make your brand stand out.
In this guide, we’ll show you exactly how to create a simple, effective setup — and how small editing touches can make your shots even better.
What Makes a Good Product Photography Setup?
A good product photography setup doesn’t need to be complicated or expensive.
What truly matters is how effectively you control three key elements: background, lighting, and camera placement.
These simple factors can make the difference between a photo that looks professional and one that gets ignored.
- Background: Clean and Consistent
The background sets the tone for your entire product image.
For ecommerce photography, a clean, neutral backdrop helps eliminate distractions and keeps the viewer focused on the item itself.
While white is often the go-to for consistency, colored or textured backgrounds can also support your brand aesthetic — as long as they’re smooth, wrinkle-free, and distraction-free.
Even budget-friendly materials like foam boards, paper rolls, or light fabrics can create a professional-looking photo background for products.
- Lighting: Bright and Natural-Looking

Lighting is the foundation of any great product photo.
Whether you’re using natural window light or a DIY lighting setup with softboxes or ring lights, the goal is always even lighting with soft shadows.
✦ Use diffused light to bring out product textures and avoid harsh contrast.
✦ Place a reflector or foam board opposite your main light source to soften shadows and brighten darker areas — a small trick with big results.
- Camera Placement: Stable and Aligned
Consistency in product photo angles helps build trust and visual clarity across your images. A tripod or stable surface keeps your shots steady and framing uniform — whether you’re shooting from eye level, using a 45-degree setup, or creating flat lay photography. Even for smartphone users, a basic tripod for product photography can make a noticeable difference in both quality and consistency.
- Small Details That Make a Big Difference
Before you hit the shutter, take a moment for final checks:
Make sure your product is clean, free of dust or fingerprints, and styled simply to avoid distractions.
Props should support — not compete with — your item, and your overall look should reflect consistent visual branding.
With clean product images, soft lighting, and stable framing, even an affordable product photography setup can deliver professional results.
Next, let’s look at how to build that setup step by step — no studio required.
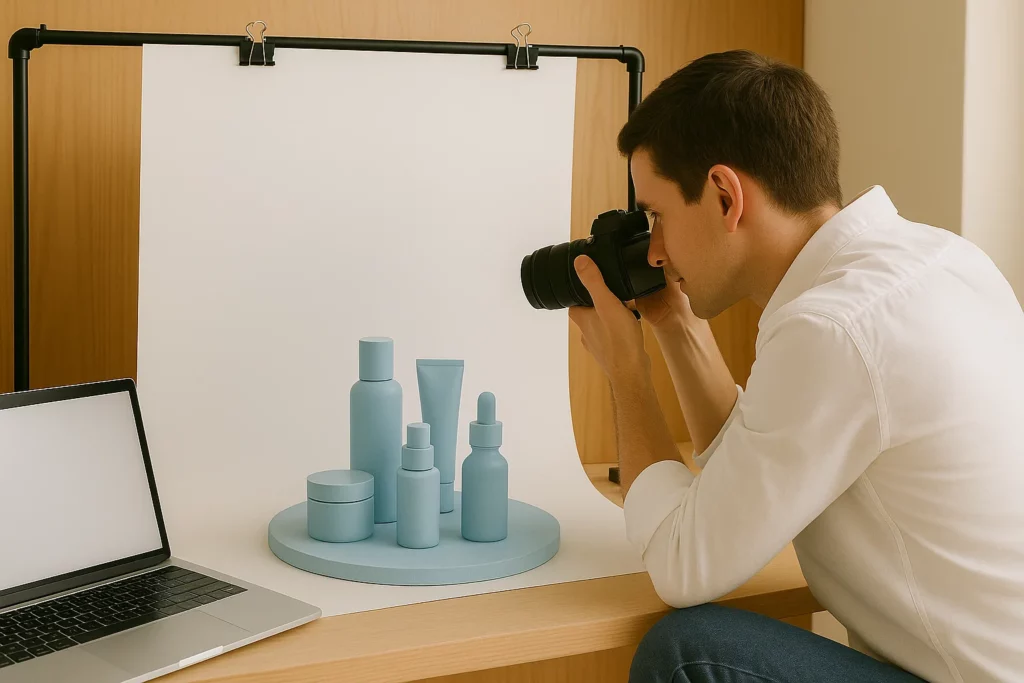
How to Set Up Product Photography(Step-by-Step)
You don’t need a full studio or expensive gear to capture great product photos.
With a few essentials and some smart setup tricks, you can build a DIY product photography space right at home — even if you’re working with limited room or a tight budget.
Here’s how to get started:
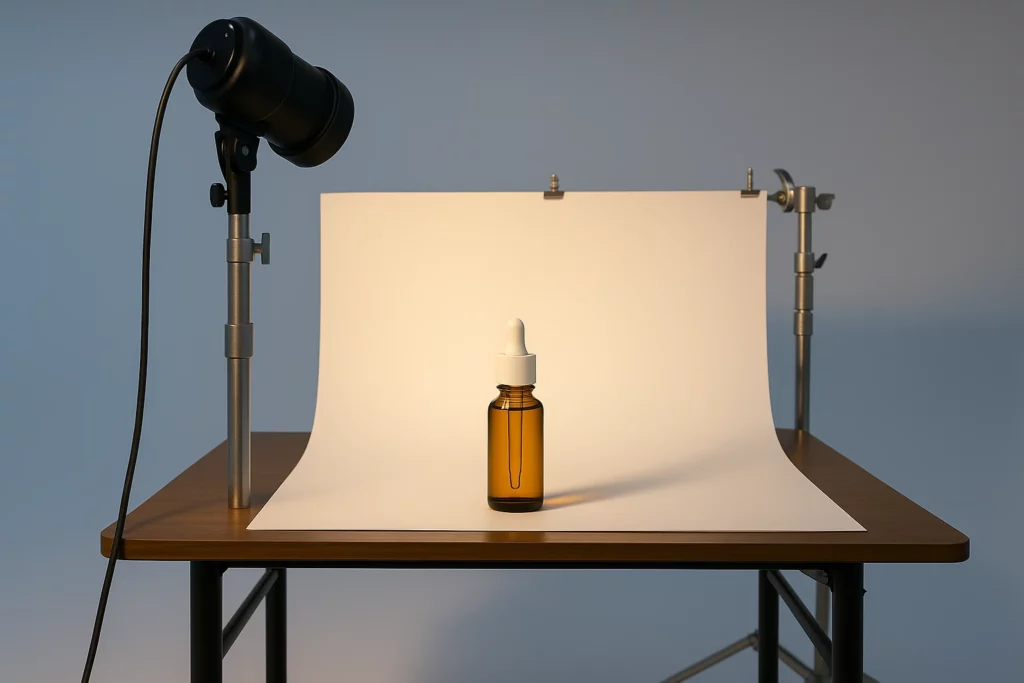
- Find Your Shooting Space
Choose a space with plenty of natural light if possible, like near a large window.
Look for a clean, clutter-free area where you can control what appears in the background.
You don’t need much — a simple table, floor space, or even a portable setup can work perfectly.
If natural light is limited, make sure your space can accommodate at least one artificial light source.
- Set Up Your Background
Your background should be clean, smooth, and distraction-free.
For a simple DIY background, you can use:
- A white wall
- Foam boards
- Seamless paper rolls
- Light fabric or vinyl sheets
Set up your background in an “L” shape — one surface under the product, and one behind it — to create a seamless look.
Make sure there are no wrinkles, visible seams, or distracting textures.
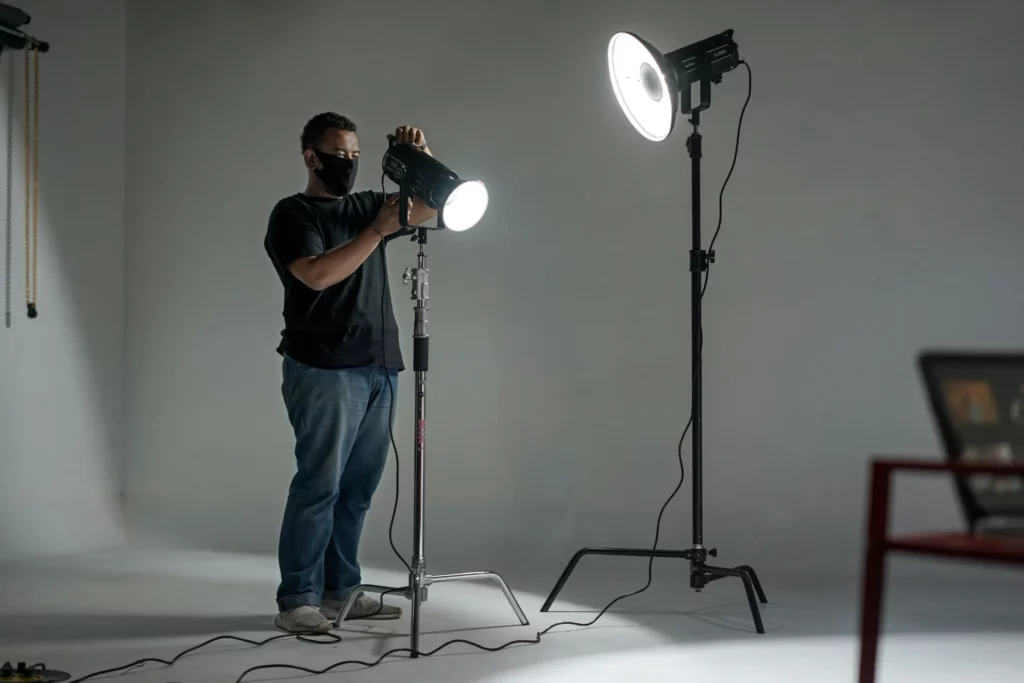
- Set Up Your Lighting
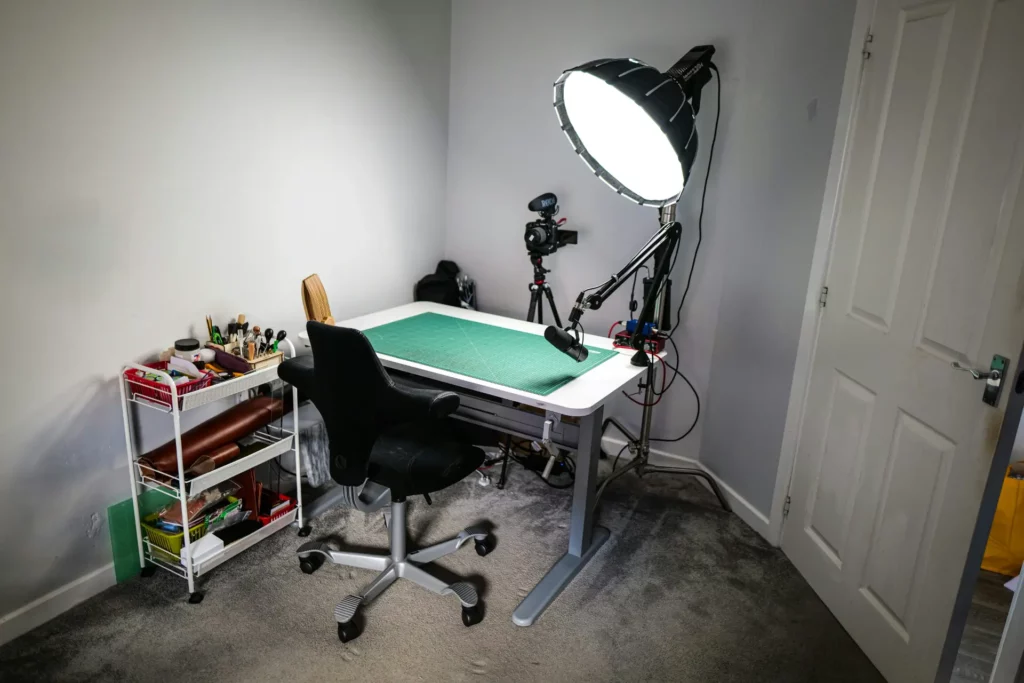
Natural Light Setup: Place your product facing a window where soft, indirect sunlight hits. Use a white foam board or a reflector on the opposite side to bounce light back onto the product and soften shadows.
Artificial Light Setup: If natural light isn’t an option, a softbox or a ring light placed at a 45-degree angle to your product can create soft, even lighting. Use a reflector or an additional light source if needed to minimize harsh shadows.
The goal is even, flattering illumination that highlights your product’s features without creating unwanted glare or dark spots.
- Position Your Camera
Stability is key to sharp, professional-looking photos.
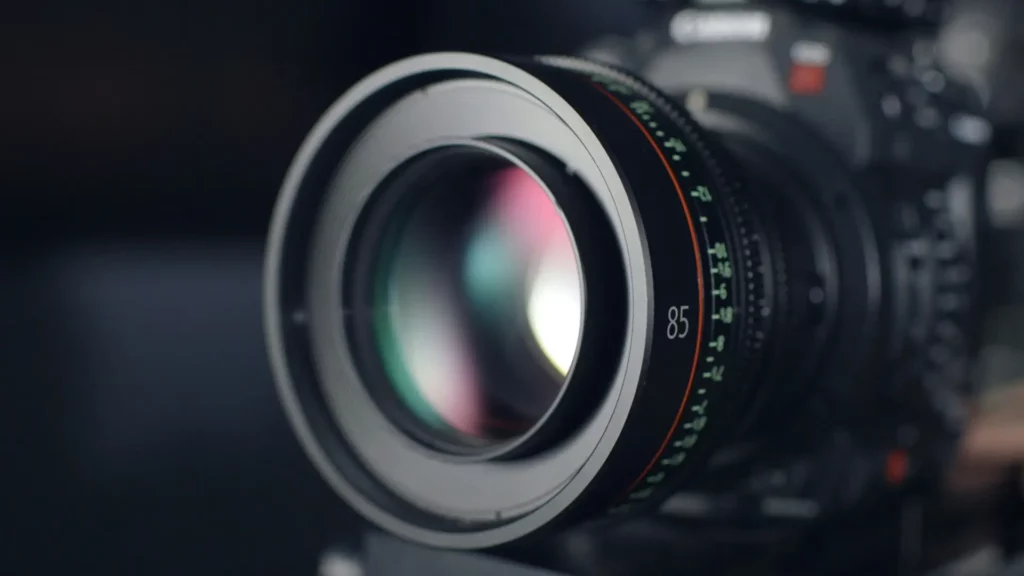
If you happen to be using a Canon 5D Mark IV with a 24–70mm lens, try the following settings for optimal product photography results:
- ISO: 200
- Aperture: f/16
- Shutter Speed: 1/125
Mount your smartphone or camera on a tripod to eliminate hand shake and maintain consistent angles.
Common shooting angles include:
- Eye-level (straight on)
- 45-degree angle (slight tilt)
- Flat lay (directly overhead)
Keep your horizon lines straight, and maintain a consistent distance between the camera and the product for each shot.
- Prepare Your Product

Before you start shooting, make sure your product is spotless.
Wipe off any dust, fingerprints, or smudges.
If you’re shooting multiple items, arrange them neatly and double-check that everything looks intentional and aligned.
Small details make a big difference when it comes to creating clean, professional product images.
With just a simple DIY setup — clean background, good lighting, and a stable camera — you’re already halfway to creating product photos that look polished and professional.
Next, let’s take a closer look at how to choose the right background for your product and make it truly stand out.
Choosing the Right Background for Your Product
Your background isn’t just decoration — it sets the tone for your entire product image. A clean, consistent backdrop improves focus and builds trust at a glance.
Let’s break down three background styles and when to use them:
- Why Your Background Matters
A clean, intentional product background immediately communicates quality and professionalism.
It keeps the viewer’s attention where it should be — on your product — while subtly reinforcing your brand’s aesthetic.
The wrong background, on the other hand, can introduce distractions, diminish perceived value, and confuse potential buyers.
Getting it right is essential for both first impressions and long-term brand consistency.
- Choosing the Right Type of Background
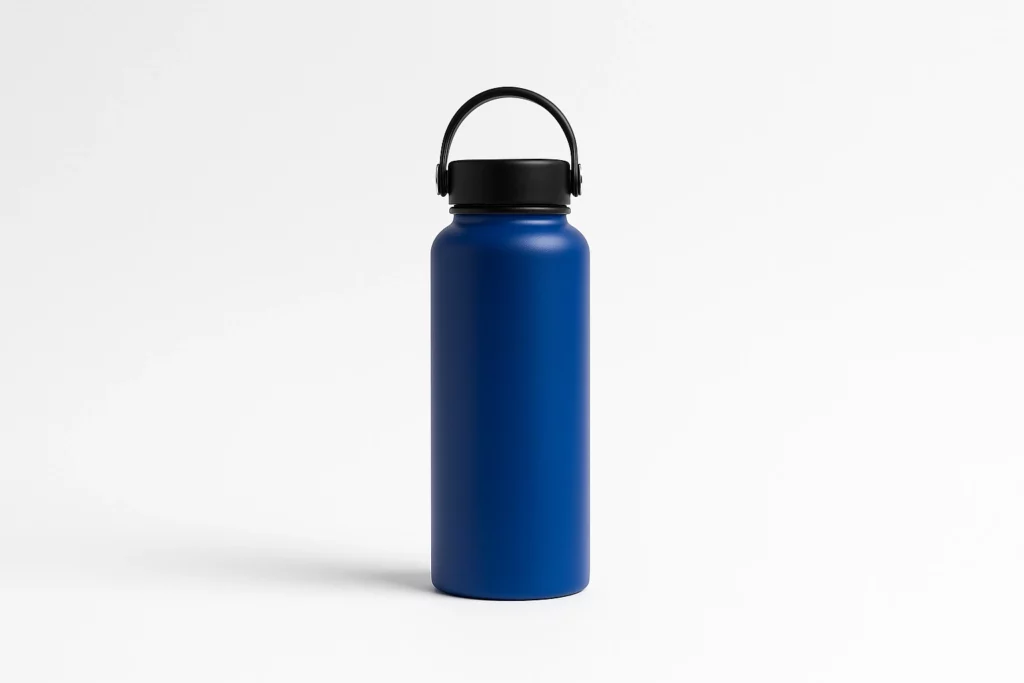
✅ White Background
For most ecommerce platforms like Amazon, Etsy, and Shopify stores, a pure white background is the gold standard.
It looks clean, puts full focus on your product, and ensures consistency across multiple listings.
Best for:
- Product catalog images
- Online store listings
- Clean, minimalist brand aesthetics
Simple DIY options:
- Foam boards
- White seamless paper rolls
- White-painted walls
✅ Colored or Gradient Background
If you’re aiming to create more branded or emotionally engaging visuals, colored or gradient backgrounds can work beautifully.
Soft colors can add personality without overpowering your product, while subtle gradients create depth and visual interest.
Best for:
- Social media content (Instagram, Pinterest, TikTok)
- Seasonal campaigns or promotions
- Building a recognizable brand style
Pro tip: Choose background colors that complement your product or reflect your brand palette for a cohesive look.
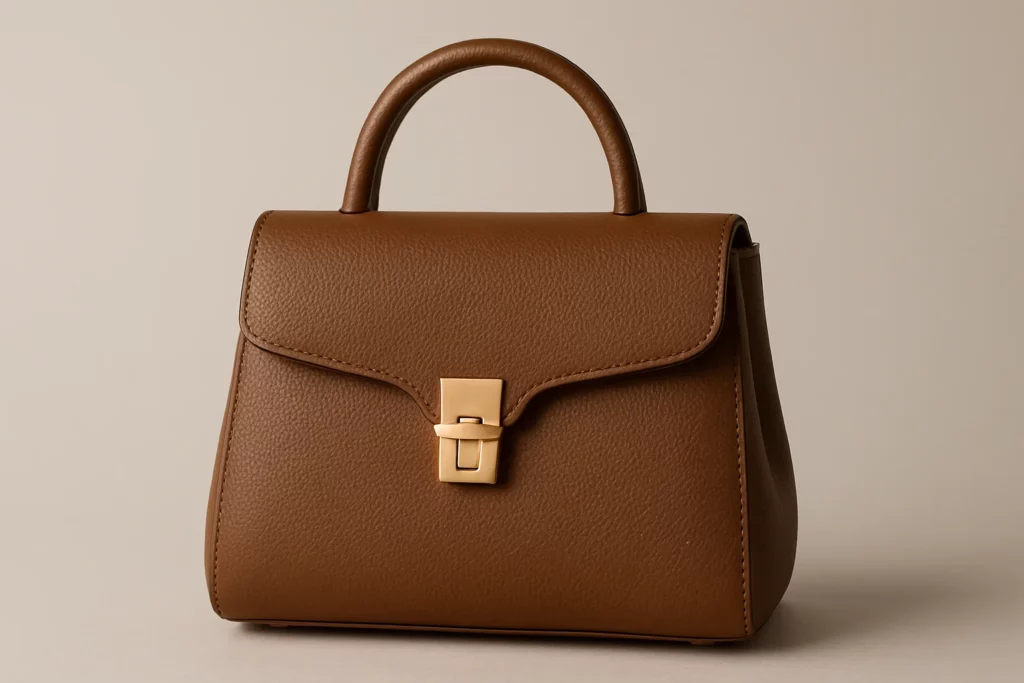
✅ Textured or Styled Background
Textured backgrounds add warmth and a lifestyle feel to your product shots.
Surfaces like wood, linen, marble, or stone bring character to your images, making them feel less sterile and more relatable.
Best for:
- Handmade goods (e.g., jewelry, crafts)
- Food photography
- Wellness and beauty products
Simple DIY ideas:
- Wooden tabletops
- Fabric throws or textured cloth
- Printed vinyl backdrop sheets
- DIY Background Ideas on a Budget
You don’t have to spend much to create beautiful backdrops.
Here are a few affordable options:
- White or colored foam boards
- Matte poster boards or card stock
- Washable fabrics or bedsheets
- Rollable vinyl backgrounds (available on Amazon or Etsy)
Keep your materials smooth, wrinkle-free, and neutral unless a specific texture or color is part of your brand aesthetic.
Choosing the right background is the first step in creating product photos that look professional and feel consistent across your brand.
Next, let’s explore how to properly light your setup to bring out the best in both your product and its background.
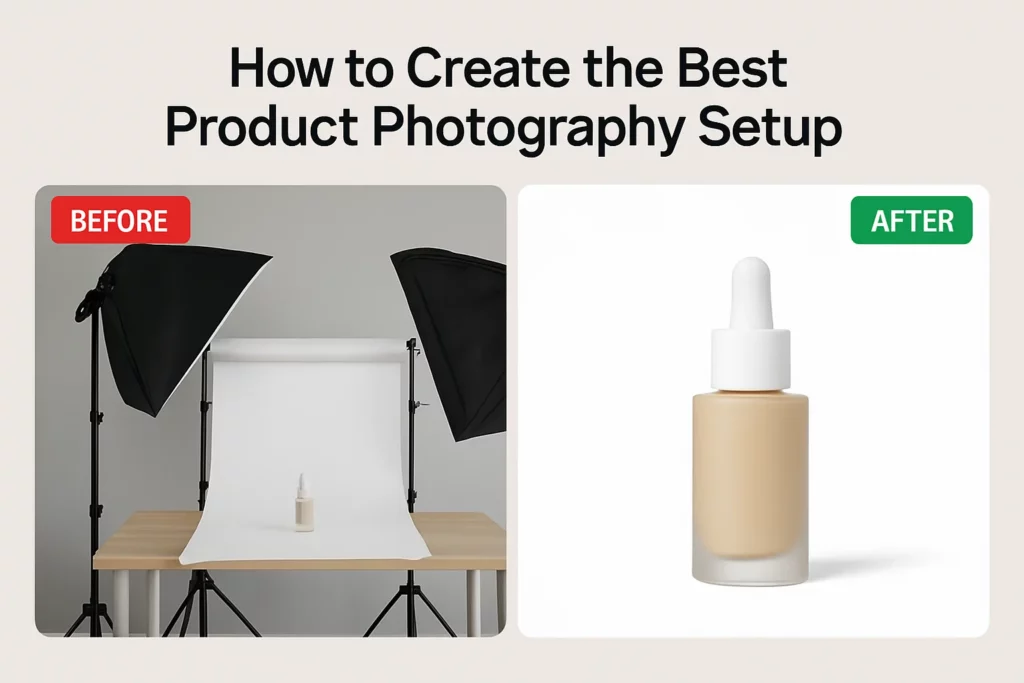
Quick Product Photo Editing and Touch-Ups — Made Easy with PhotoGrid
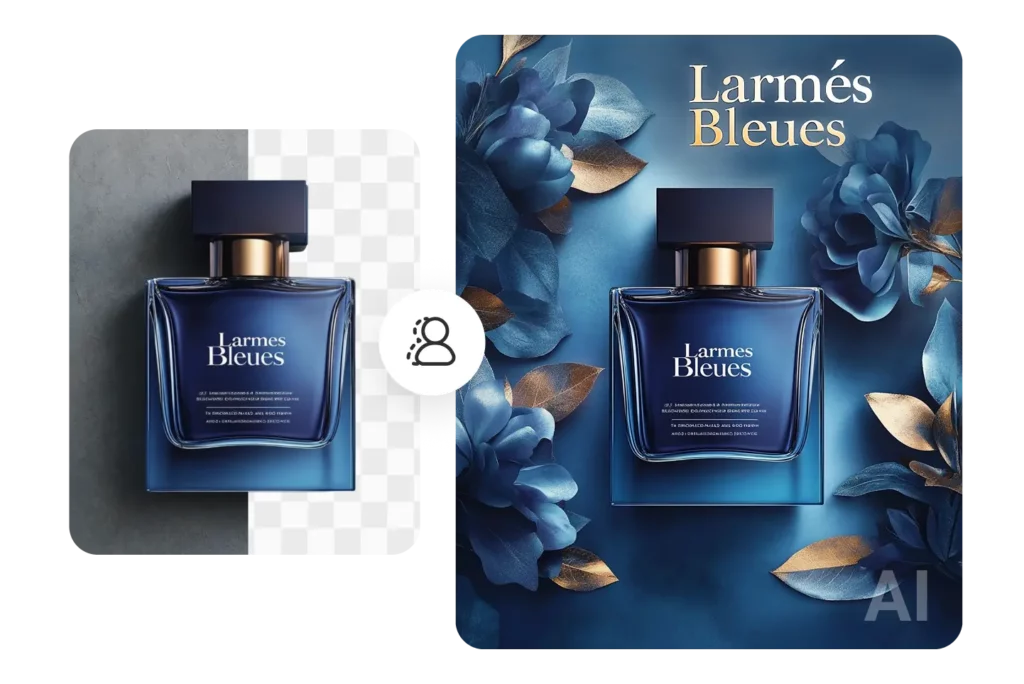
Easily remove backgrounds and replace them with stunning scenes in just one click. Create professional-looking product visuals effortlessly.
A great setup is only half the battle — quick edits are where your product images truly shine.
After trying various tools, I’ve found that PhotoGrid offers one of the most complete and beginner-friendly solutions.
It covers everything from background cleanup and brightness tweaks to cropping and subtle touch-ups. That’s why I often recommend it to small brands and creators looking to touch up product photos without complex software.
How to Quickly Edit and Polish Your Product Photos with PhotoGrid
- Clean Up the Background
Even the best setup can’t prevent small distractions — a wrinkled backdrop, uneven paper, or a messy surface edge.
PhotoGrid’s Background Remover lets you isolate your product instantly and replace the background with a clean, distraction-free space. Moreover, you can also switch your background to white, colored or gradient background with PhotoGrid’s editor. It’s especially useful when shooting on-the-go or with limited control over the shooting environment.
- Enhance Image Quality with AI Upscaler
Product photos that look soft or blurry can instantly reduce perceived quality — especially when viewed on high-resolution screens.
PhotoGrid’s Image Upscaler uses AI to sharpen your product photos with just one tap, enhancing details like fabric texture, packaging text, or reflective surfaces. It’s perfect for giving older images a refresh or making sure your listings look sharp and professional across all devices.
- Remove Small Flaws with Object Remover
Even a clean setup can’t prevent tiny imperfections — like dust specks, lint, or a shadow line you didn’t catch while shooting. With Object Remover, you can easily remove distractions and keep the focus where it should be: on your product. It’s especially helpful for last-minute corrections when reshooting isn’t practical, and it saves time during your photo editing workflow.
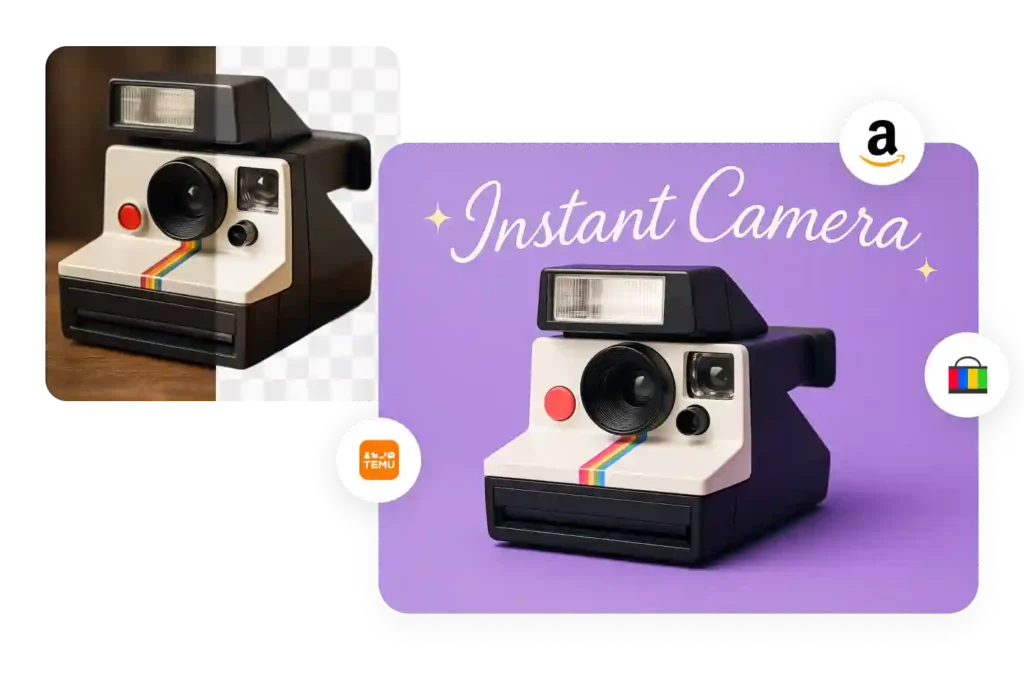
Remove backgrounds and create custom product photos that stand out on Amazon, Etsy, and your online store. Perfect for quick, professional-looking edits.
Conclusion
You don’t need a full studio or expensive gear to take product photos that stand out. With the right setup and a few smart editing tools like PhotoGrid, you can create clean, consistent, and professional-looking images — all from home. Start simple, stay consistent, and let your visuals do the selling.
❓ FAQ: Product Photography & Editing for Beginners
- What is product photography, and why is it important? Product photography refers to the process of capturing images that accurately represent and showcase a product. It plays a key role in ecommerce, marketing, and branding by helping customers visualize what they’re buying and making your listings look more trustworthy and professional.
- How can I get started with DIY product photography? Start with a simple DIY product photography setup using tools you already have — natural light, a smartphone, a stable surface, and a clean background. No need for pro gear. With good lighting and angles, you can take high-quality product photos from home.
- What’s the best way to set up product photography at home? To set up product photography, use a table near a window, add a plain background (like white paper or foam board), and position lights for even exposure. Keep your camera steady with a tripod or stand. A clean, minimal setup works best.
- How do I take pictures for ecommerce that look professional? Focus on good lighting, sharp focus, and clean backgrounds. Use consistent angles and make sure your product is centered. After shooting, use product photo editing tools like PhotoGrid to remove distractions, enhance clarity, and maintain brand consistency.
- What kind of background is best for ecommerce photography? White backgrounds are the ecommerce standard, but soft colors or realistic textures can work too — as long as they don’t distract. The goal is to create perfect images that highlight the product without clutter.
- Do I need to be a professional product photographer to get great results? Not at all! With tools like PhotoGrid and a solid DIY setup, anyone can create polished visuals. Many small brands and creators are now handling ecommerce photography themselves — no need for a full studio or advanced training.
- What tools can I use to edit product photos easily? You can use mobile-friendly apps like PhotoGrid for fast and simple product photo editing. Key features like background remover, object eraser, and upscaler help turn basic shots into perfect images without advanced software.