Key Takeaways
- Learning how to enhance a photo with AI means letting the tool handle corrections automatically, with no manual settings needed.
- Results vary by photo type, so portraits, night shots, old photos, and product images all respond differently to AI enhancement.
- A good result should look like a clearer version of the same photo, not a different image.
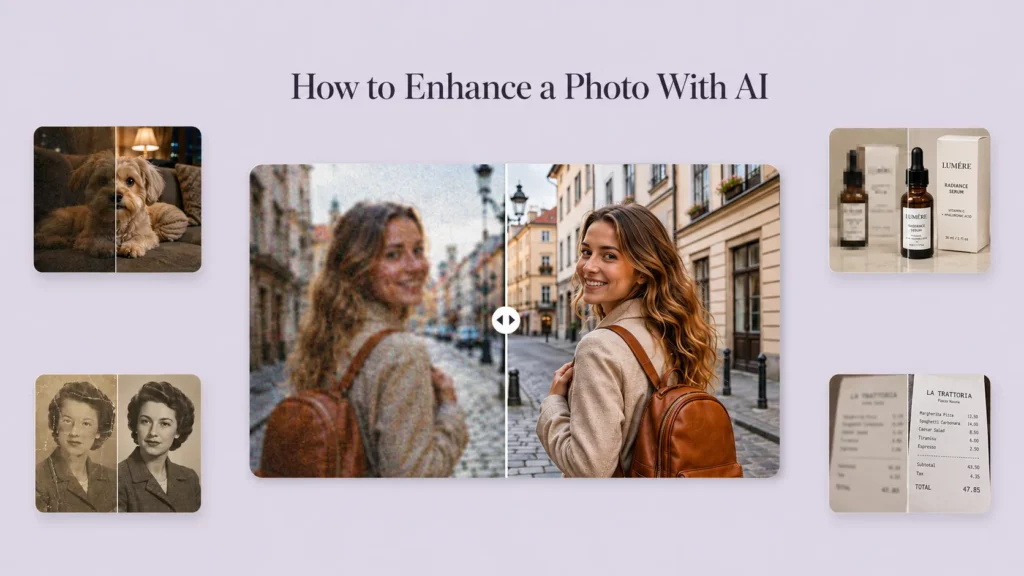
I tested AI photo enhancement across more types of images than I expected: a soft portrait from a dim café, a grainy night photo, an old family photo from a drawer, and a product shot that fell apart the moment I zoomed in.
What I found is that AI enhancement does not work the same way on every photo. The results depend heavily on what kind of problem the original image has, how much recoverable detail it still contains, and whether the tool is clarifying what is already there or starting to guess.
This guide covers the basic workflow, then walks through five different photo problems with real results, so you can see exactly where AI enhancement works well, where it starts to fill in detail that was never there, and when the original file is simply too far gone to recover cleanly.
What Does It Mean to Enhance a Photo With AI?
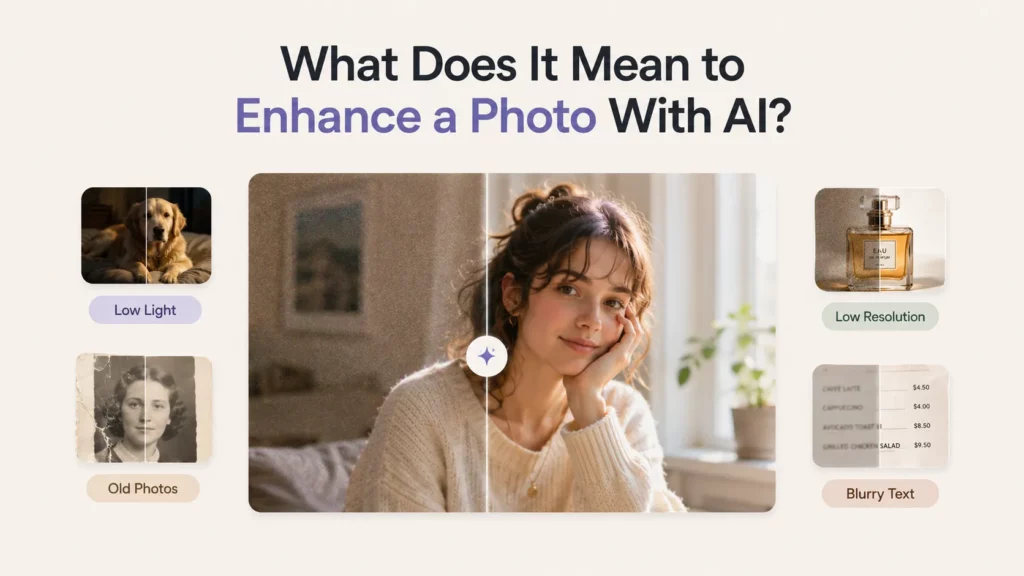
AI photo enhancement uses AI to automatically improve common image-quality problems such as blur, noise, poor lighting, faded color, and low resolution. Unlike simply increasing the sharpness slider, an AI enhancer analyzes several problems in the same image and applies multiple corrections together.
This makes it useful when you know a photo looks bad but are not sure whether it needs sharpening, denoising, brighter exposure, or higher resolution. Instead of adjusting each setting manually, the AI handles the basic quality corrections for you.
How to Enhance a Photo With AI in 3 Steps?
Most AI photo enhancers follow a simple workflow. You do not need advanced photo-editing skills to get started.
Step 1. Open PhotoGrid Agent
Go to PhotoGrid Agent and start a new session.
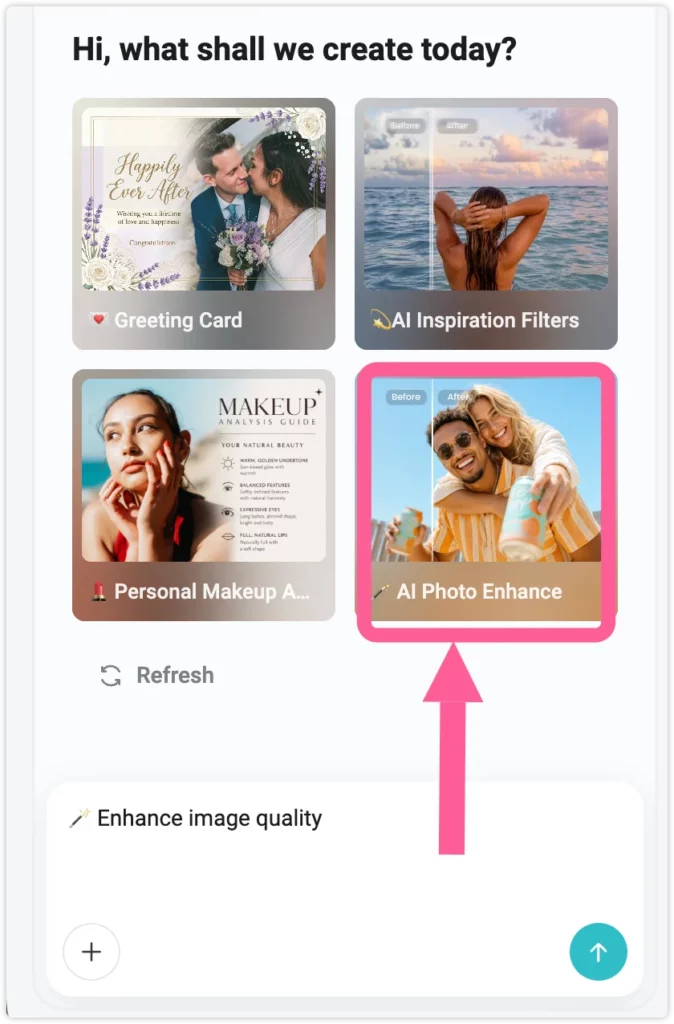
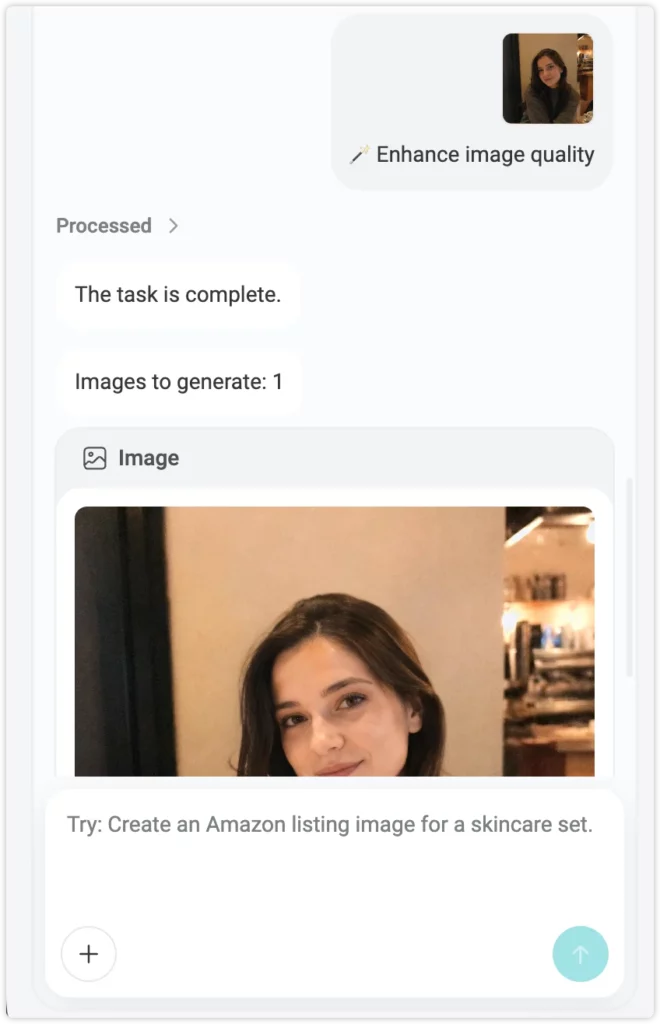
Step 3. Select AI Photo Enhance
Choose AI Photo Enhance and let the tool process the image automatically.
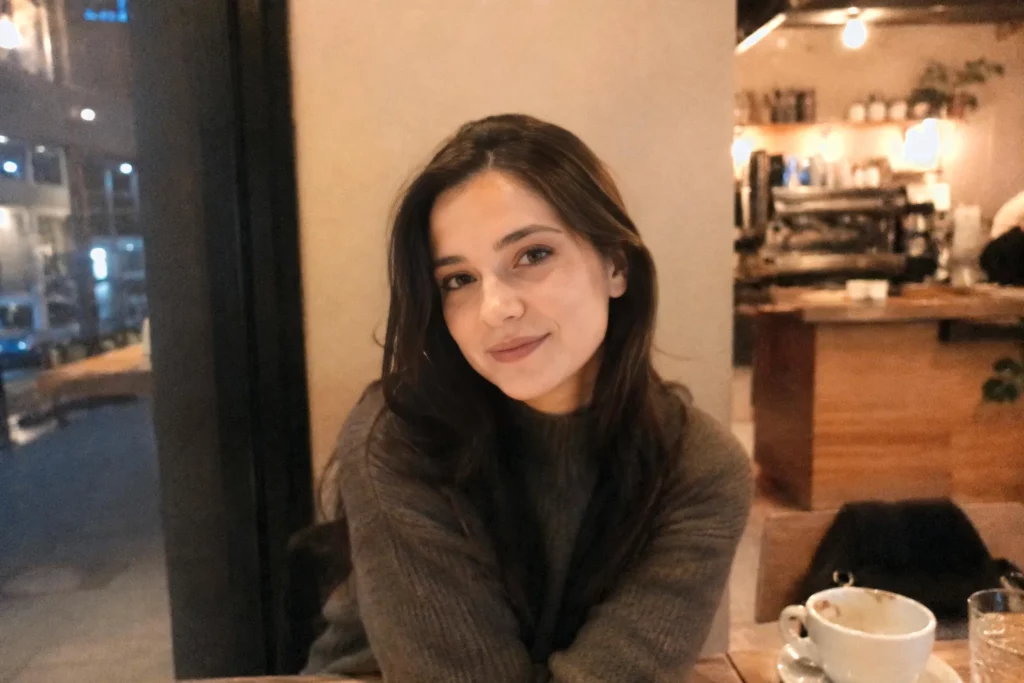
It analyzes common quality problems and applies the necessary corrections without requiring manual settings or a detailed prompt.
What Can AI Actually Fix in a Photo?
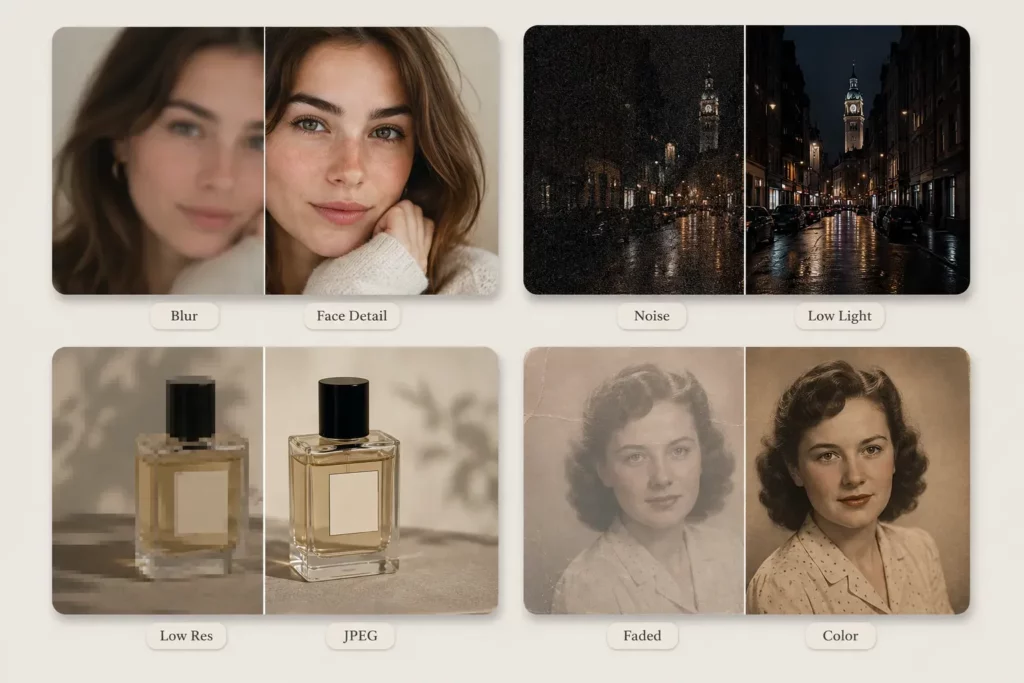
AI can enhance the quality of a photo by addressing several problems at once, rather than requiring you to adjust each setting manually. Different photo problems respond differently, and understanding that difference helps you set realistic expectations before you start.
| Photo Problem | What AI Can Usually Improve |
|---|---|
| Slight blur | Make visible edges and details clearer |
| Noise and grain | Reduce distracting digital noise |
| Dark exposure | Brighten shadows and reveal visible detail |
| Low resolution | Improve usable clarity and definition |
| JPEG compression | Reduce blocky or muddy-looking areas |
| Soft facial detail | Clarify visible eyes, hair, and skin texture |
| Dull color | Improve contrast and color balance |
| Faded photo | Make existing details easier to see |
The important phrase here is existing detail. AI can make captured information clearer. When important information is completely missing from the original, the model may have to predict what belongs there rather than recover what was actually there.
That difference becomes much easier to see when you test several kinds of photos instead of relying on a single before-and-after example. The best photo enhancer guide covers the most popular options and how they compare.
5 Real AI Photo Enhancement Examples (And What Each One Taught Me)
For these tests, I used PhotoGrid Agent’s AI Photo Enhance feature. I expected to spend time figuring out which correction each photo needed. Instead, after uploading the image and selecting AI Photo Enhance, PhotoGrid created the enhancement task automatically. I did not write a single instruction.
Here is a quick overview of the five photo types I tested and what happened in each case.
| Photo Type | Main Problem | Result |
|---|---|---|
| 🌫️ Blurry portrait | Soft focus, no hair detail | Eyes, hair, and texture recovered |
| 🌙 Dark night photo | Deep shadow, grain | Face visible, atmosphere preserved |
| 🕰️ Old family photo | Scratches, faded color | Scratches reduced, faces clarified |
| 🛍️ Product photo | Flat texture, muddy label | Label and surface sharpened |
| 📄 Book page / text | Fuzzy letter edges | Text noticeably easier to read |
1. How to Enhance a Blurry Photo With AI
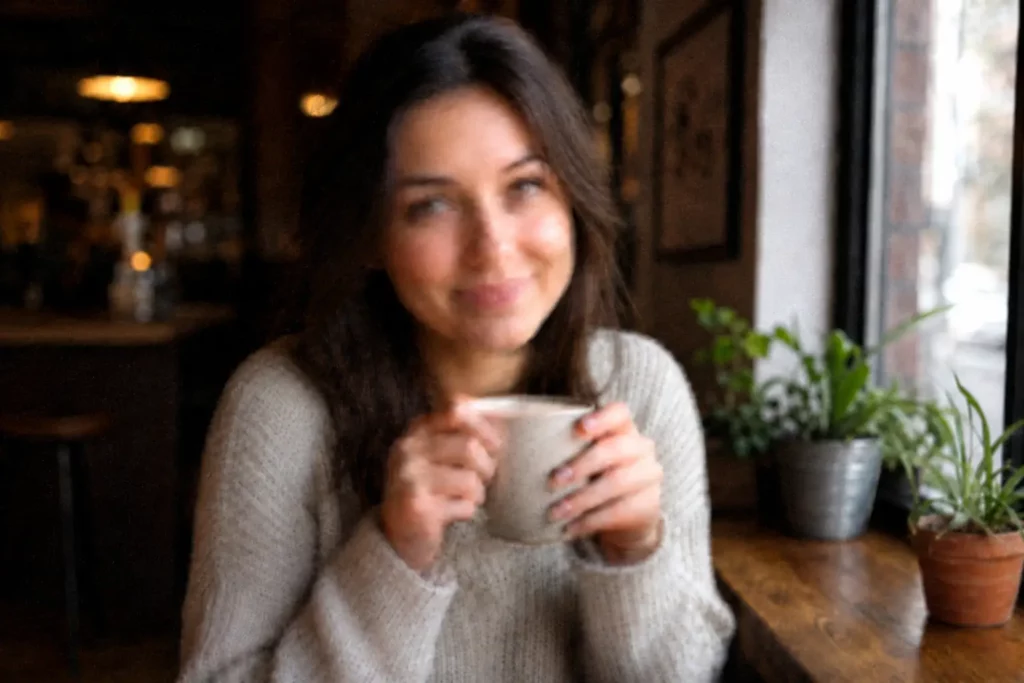
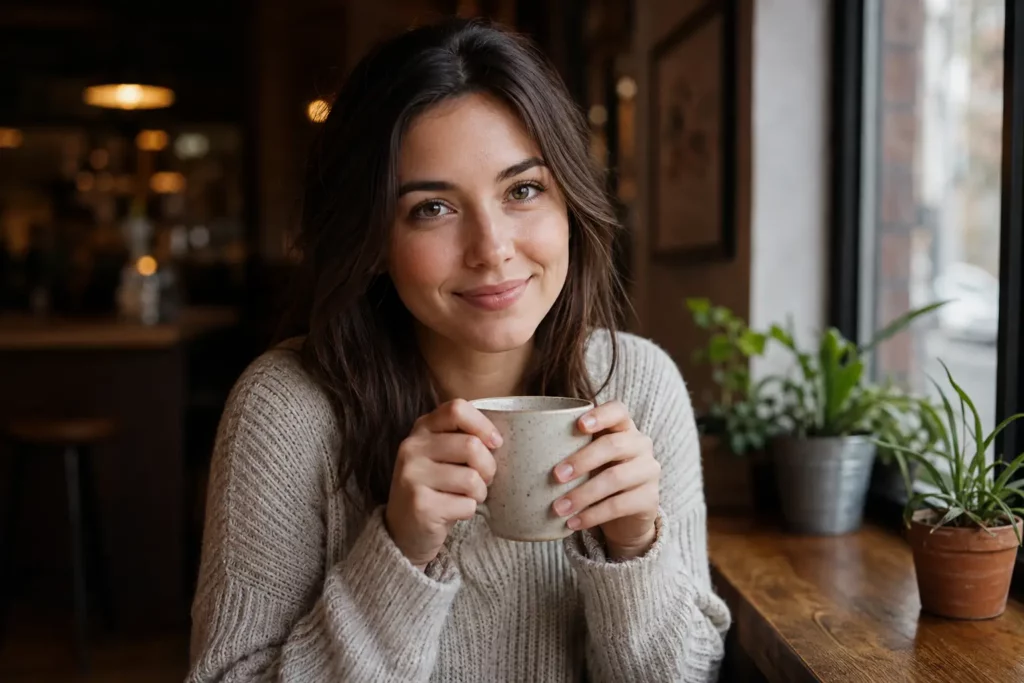
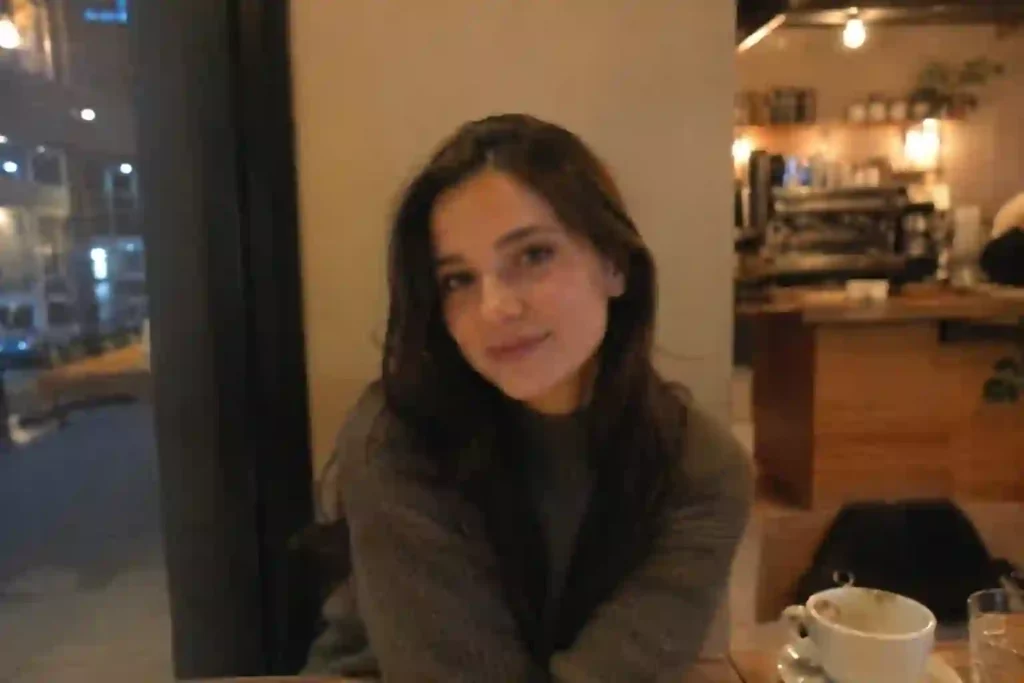
The original was a café portrait taken at close range. The whole image had a soft, out-of-focus look, like the camera had locked onto the background instead of the face. The eyes were hard to read, the hair merged into one dark shape, and the sweater texture was completely lost.
After enhancement, the difference was easy to see. The eyes became distinct, with visible lashes and iris detail. Individual strands of hair separated clearly. The knit texture of the sweater came back. The background stayed blurred, which is correct since it was already out of focus in the original.
What surprised me was how much facial structure came through. The cheekbones, lip line, and smile looked natural rather than over-sharpened.
What worked: eye detail, hair definition, sweater texture, and overall facial clarity.
What to watch: skin tone. In this test it stayed natural, but over-enhancement can push skin toward a smoothed, plastic look.
Best for: selfies, casual portraits, soft phone photos, and slightly blurry images.
Unblur image to recover eyes, hair, and facial definition in one pass.
2. How to Enhance a Dark Photo With AI
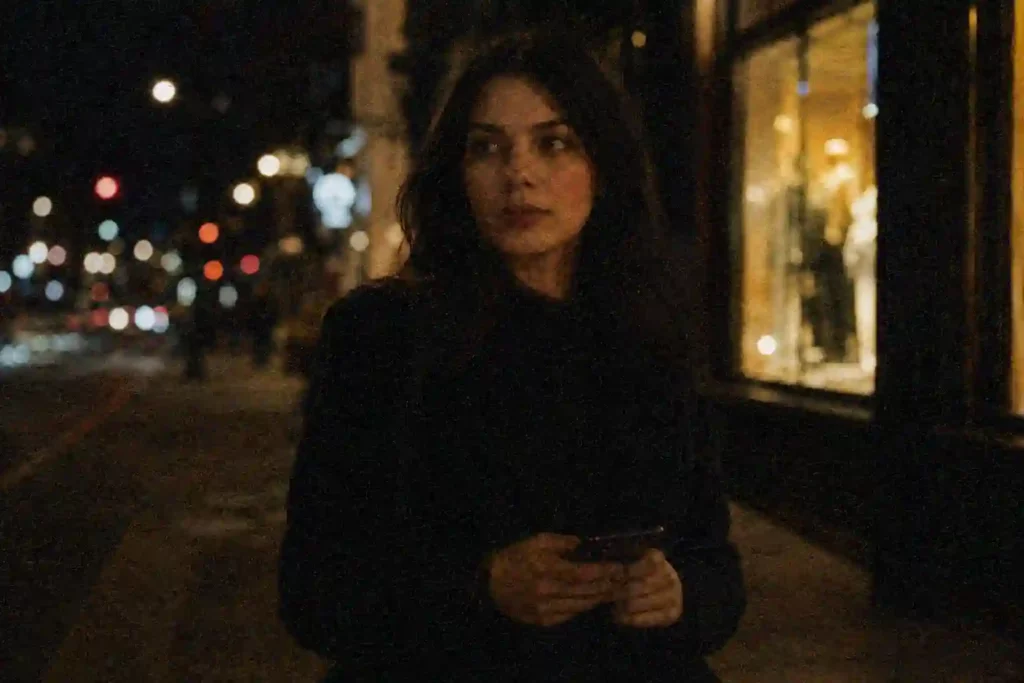
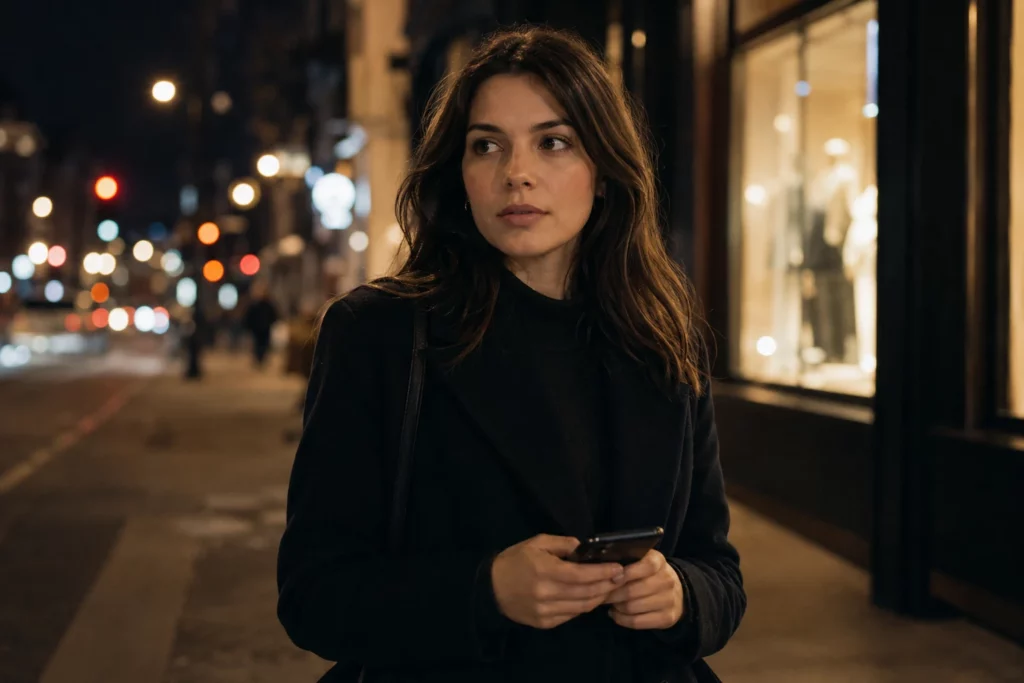
The original was a night street shot. The face was barely readable, buried in deep shadow. The black coat disappeared into the background, the hair had no definition, and the shop window behind her was a dim smear of orange light.
After enhancement, the face became clearly visible. The eyes, nose, and lip line all came through. The coat still read as dark but now had visible folds and fabric texture. The background lights stayed warm and bokeh-like rather than getting flattened into a bright wash.
That last part matters. The photo still looked like a night scene. It did not look like a photo taken in daylight with a dark filter applied on top.
What worked: facial visibility, coat texture, and background light atmosphere.
What to watch: hair in dark areas. In this test some fine strands in the darker sections became slightly uniform rather than individually defined.
Best for: night streets, restaurants, concerts, parties, and dim indoor photos.
3. How to Enhance an Old Photo With AI
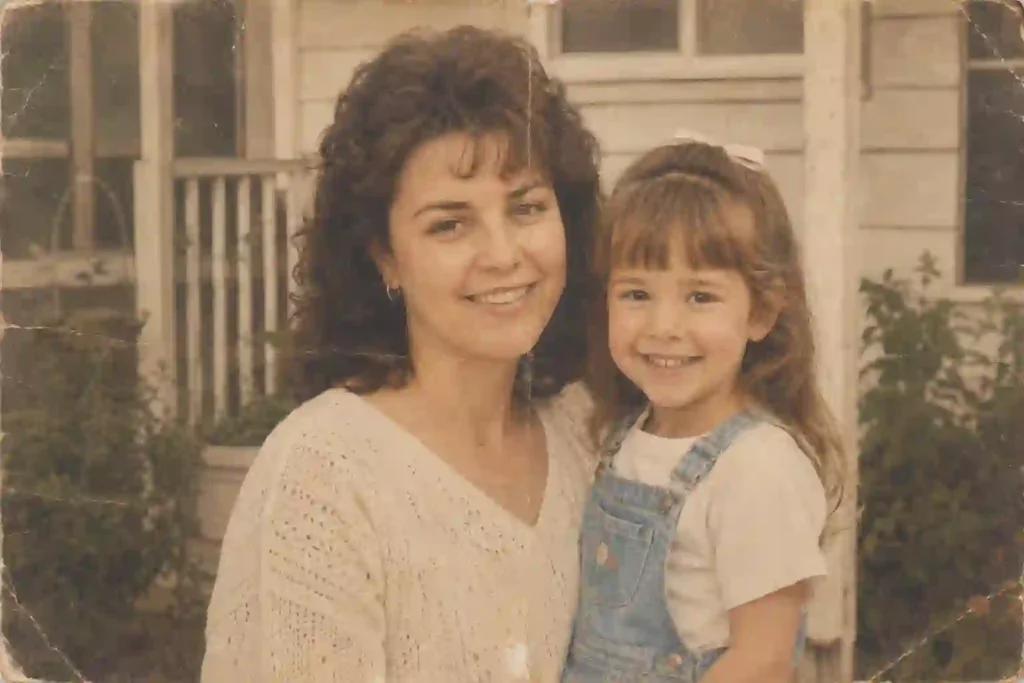
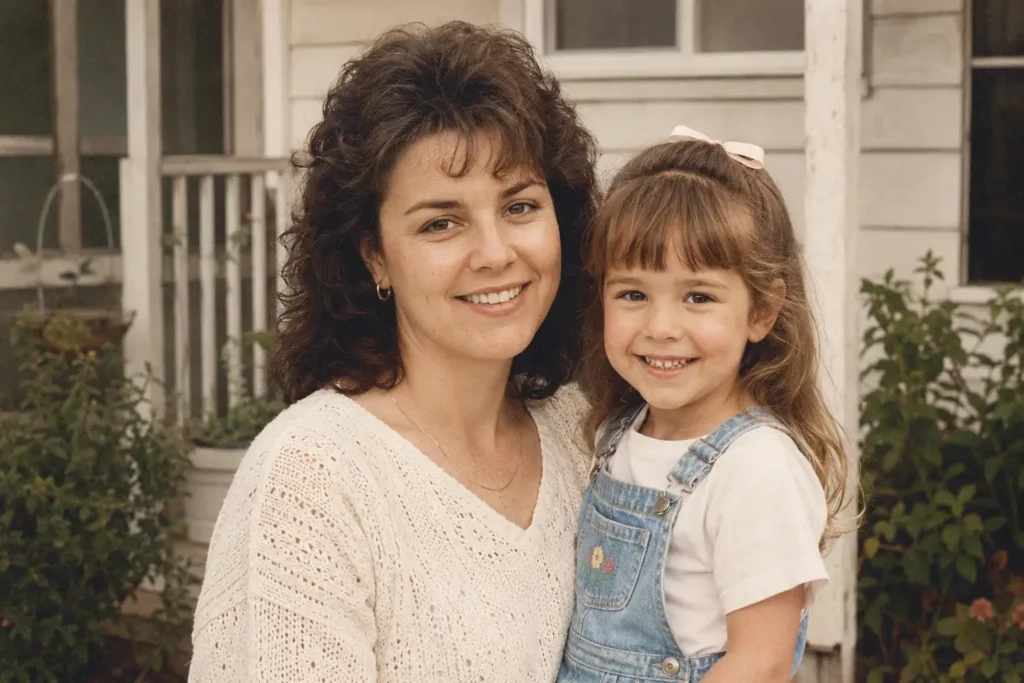
The original was a family portrait with visible age damage. There were vertical scratch lines across the image, faded warm tones overall, soft edges on both faces, and worn corners. The younger child’s hair detail was almost completely lost.
After enhancement, the scratches were reduced significantly, though not completely invisible on close inspection. The skin tones became cleaner and less orange. Both faces gained more definition, with the eyes and smile lines easier to read. The child’s hair became more distinct.
What I checked most carefully was whether the faces still looked like the same people. They did. The AI clarified what was already there rather than rebuilding the faces from scratch.
What worked: scratch reduction, face clarity, color balance, and hair definition.
What to watch: compare the eye shape and jawline against the original before keeping the result. Enhancement cannot guarantee accuracy when damage is severe.
Best for: faded family photos, scanned prints, and slightly damaged old portraits.
For photos with heavier scratches, tears, or physical damage, a dedicated photo restoration may be more suitable than basic enhancement alone.
4. How to Enhance a Low-Resolution Product Photo
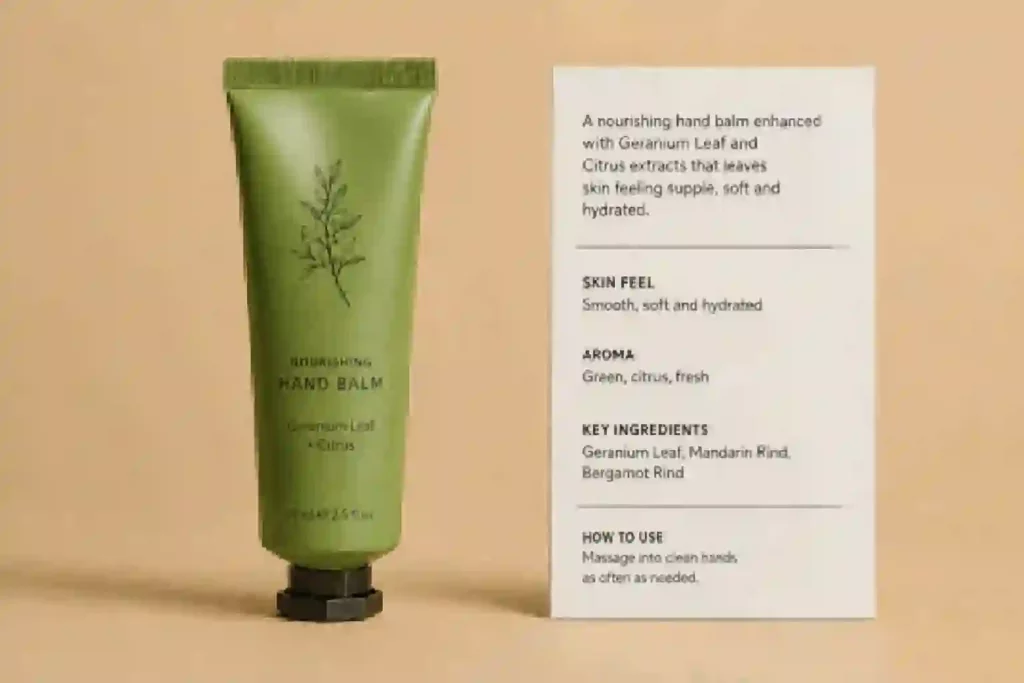
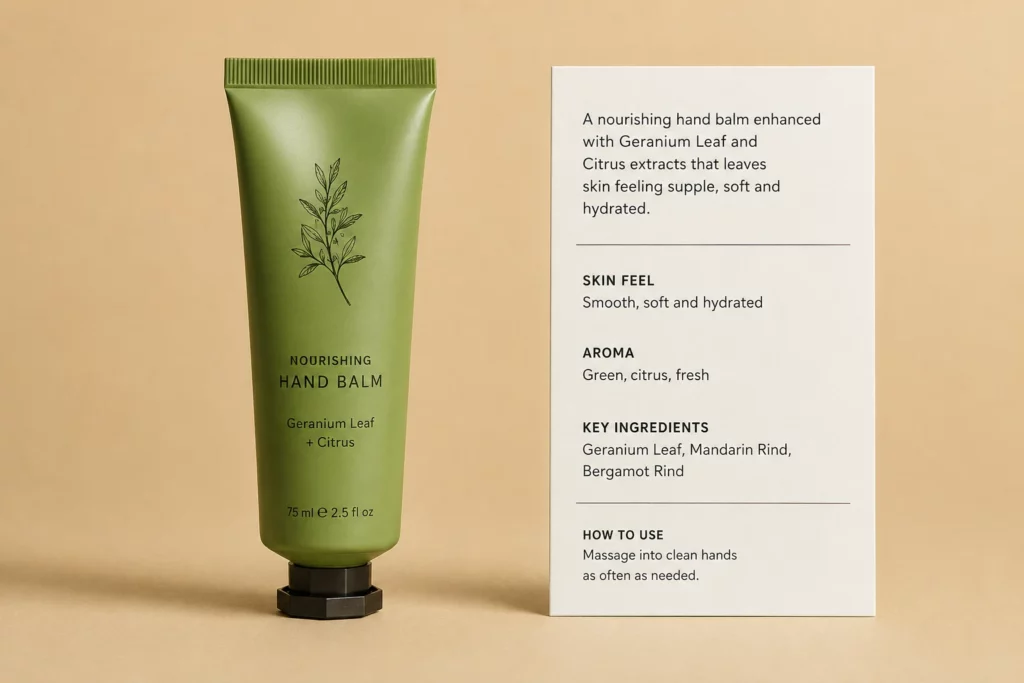
The original was a compressed product shot of a hand balm tube with an ingredient card beside it. The tube surface looked flat, the botanical illustration on the label was soft and indistinct, and the text on the card was readable but slightly muddy around the letter edges.
After enhancement, the tube surface had more visible texture and the label illustration became cleaner with sharper line edges. The card text tightened up noticeably, with crisper contrast between the letters and the white background.
The product shape, color, and label content stayed accurate. Nothing was redesigned or reconstructed. That is the standard that matters for a product image.
What worked: label sharpness, surface texture, and text clarity on the ingredient card.
What to watch: logo and label lines. Zoom in and confirm the text and illustrations match the original exactly before using the image in a listing.
Best for: marketplace listings, online stores, product catalogs, and social commerce.
If the product already looks clear but the file is simply too small, use an image upscaler afterward to increase the output size.
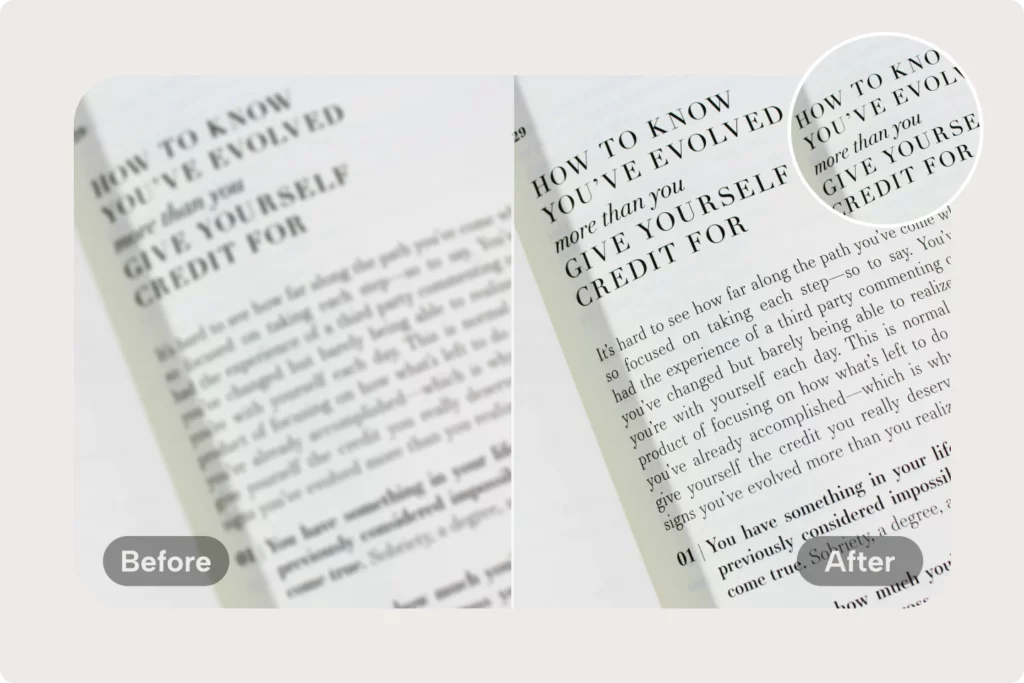
5. How to Make Blurry Text in a Photo Clearer
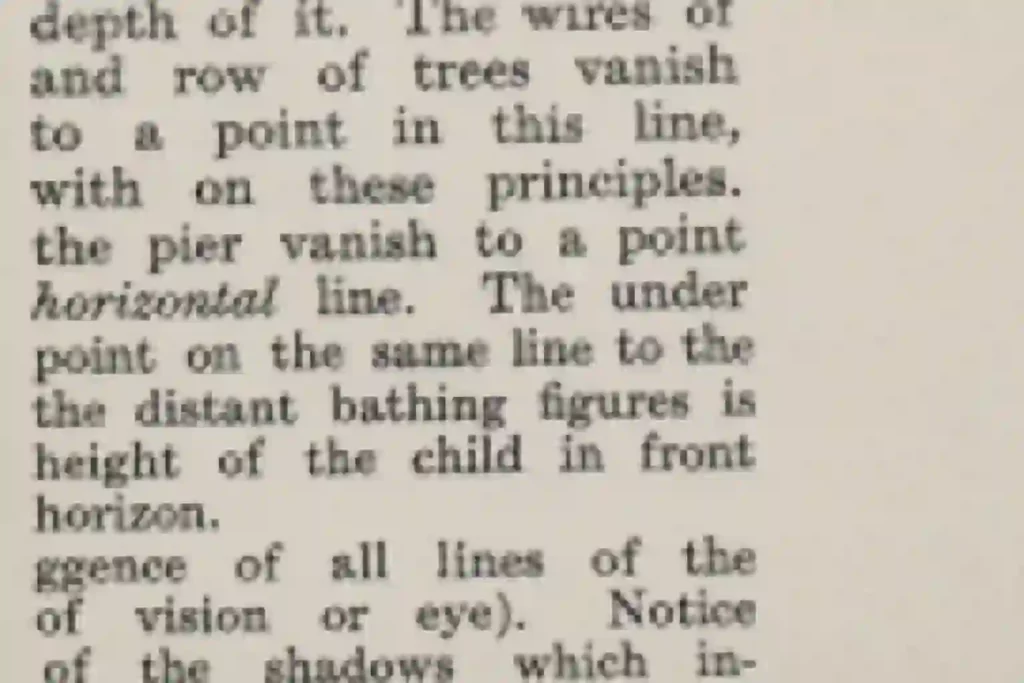
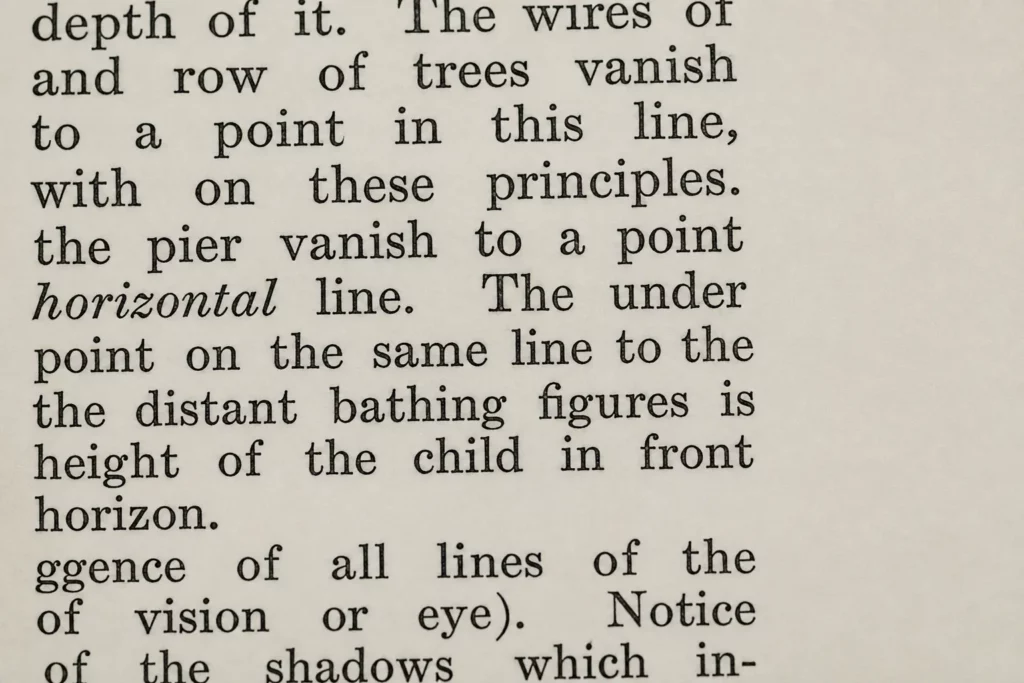
The original was a photo of a book page. The text was readable in the center but the letters had soft, slightly fuzzy edges throughout, with visible grain from the paper texture underneath.
After enhancement, the letter edges tightened across the whole page. The contrast between the black text and the off-white paper improved, making the lines easier to scan quickly. The italic word in the middle of the page became noticeably cleaner.
The content of the text stayed the same. No characters were substituted or rewritten, which is the most important thing to verify with any text image.
What worked: letter edge clarity, contrast, and overall readability.
What to watch: small characters and punctuation. Compare the enhanced version word by word against the original for anything important.
Best for: screenshots, book pages, labels, menus, signs, and compressed text images.
Unblur text to sharpen letter edges and recover readable characters before you use the image anywhere.
How to Keep AI-Enhanced Photos Looking Natural?
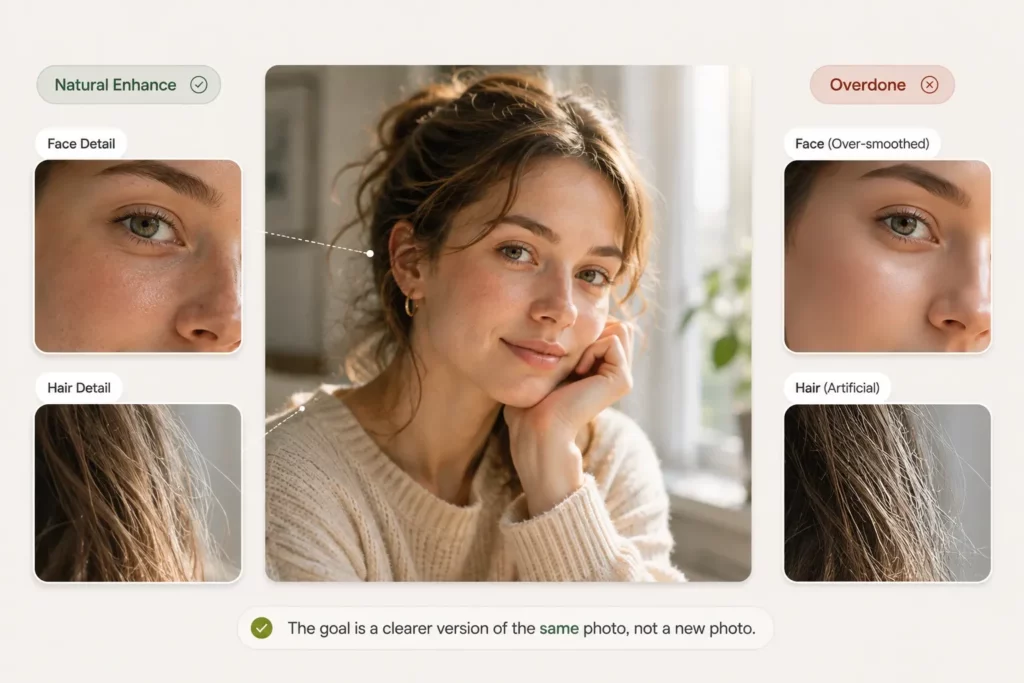
Making an image clearer is useful. Making it look obviously AI-processed is not. One of the biggest mistakes with photo enhancement is assuming that more processing always means more quality. Stronger processing does not guarantee better output.
The goal is a clearer version of the same photo, not a new photo that happens to look sharper.
Check the Face First
Faces are usually the easiest place to notice unwanted changes. Compare eye shape, nose, lips, jawline, and facial proportions between the original and the enhanced version. If the enhanced person looks subtly different, the AI may be reconstructing details rather than simply clarifying them.
Keep Skin Texture Natural
Over-enhanced portraits often develop a smooth, artificial surface. Watch for waxy skin, excessive smoothing, plastic-looking highlights, and unnaturally sharp pores. Real skin has texture, and removing every small imperfection can make the result look less like a photograph and more like a rendering.
Look Closely at Hair and Fine Edges
Hair reveals over-processing quickly. Look for invented strands, glowing outlines, crunchy edges, and strange patterns around the hairline. The same applies to fur, fabric, tree branches, jewelry, and other fine details throughout the image.
Always Compare With the Original
Ask one question before keeping the result: does this look like a clearer version of the same photo? That is the standard that matters. A successful enhancement does not need to look perfect. It needs to look believable.
What AI Photo Enhancement Cannot Fully Fix
AI can improve a surprising amount of visible damage, but it cannot accurately recover every photo. The amount of recoverable information in the original image still determines the limit.
| Problem | What to Expect |
|---|---|
| Slight blur | Often improves well |
| Low-light noise | Usually improves |
| Low resolution | Can become more usable |
| JPEG compression | Often improves visually |
| Severe motion blur | Limited recovery |
| Tiny facial details | AI may need to predict detail |
| Large missing areas | Exact original information cannot be recovered |
| Completely blown highlights | Lost detail may remain lost |
Severe motion blur is a useful example. Suppose someone’s face was captured while they were moving quickly and the camera recorded a long blurred streak instead of a recognizable face. AI may make that image cleaner, less noisy, and slightly sharper around the edges. It cannot reliably know the exact position of the person’s eyelashes, expression, or lips at that moment because those details were never clearly recorded.
AI can generate a plausible reconstruction. It cannot guarantee that reconstruction matches the original reality. That is why keeping the untouched source file matters, especially for family photos, important documents, or product images where accuracy is essential.
AI Photo Enhancer vs. Image Upscaler: What Is the Difference?
Enhancement and upscaling are often mentioned together, but they solve different problems.
| AI Photo Enhancer | AI Image Upscaler | |
|---|---|---|
| Main goal | Improve overall image quality | Increase image size and resolution |
| Fix blur | Usually | Sometimes |
| Reduce noise | Often | Sometimes |
| Improve lighting | Often | Usually not the main purpose |
| Improve color | Often | Usually not |
| Increase dimensions | Not always | Yes |
| Best for | Poor-quality photos | Small images and larger output |
Enhance when the photo looks bad, and upscale when the photo is too small. Sometimes you need both. A small grainy product image may need enhancement first to clean up the noise and sharpen the edges, then upscaling to create a larger output file for a marketplace listing or print.
If your main goal is to enhance the resolution of a photo rather than correct blur or noise, an image upscaler is usually the better starting point.
Do You Need a Prompt to Enhance a Photo With AI?
You do not always need a prompt to enhance a photo with AI.
Some tools let you describe exactly what you want with a text prompt, which is useful for creative edits or specific changes such as changing the background or restyling a scene. General photo enhancement is different.
My assumption going in was that I would need to describe every problem. Reduce the grain. Sharpen the face. Brighten the shadows. I did not write any of that. After selecting AI Photo Enhance in PhotoGrid Agent, the tool automatically identified the image quality issues and processed the photo.
Prompts become more useful when the goal shifts from improving the original image to transforming it into something new. For most common photo problems, automatic enhancement is faster and requires no prior knowledge of photo editing.
When AI Photo Enhancement Works Best
Poor image quality does not always mean a photo is beyond saving. AI enhancement works best when the image still contains recognizable detail but needs help with blur, noise, lighting, or resolution.
Upload your photo and choose AI Photo Enhance to try the same automatic workflow on your own image.
Start by identifying the actual problem. A blurry portrait, a noisy night photo, a faded family picture, and a compressed product image all need slightly different kinds of improvement. Then compare the enhanced result with the original. If the image becomes clearer while the face, product, text, and fine details remain recognizable, the enhancement has done its job.
How to Enhance a Photo FAQs
Can AI make a blurry photo clear?
AI photo enhancement can often make a slightly blurry photo clearer by sharpening visible details and improving edge definition. Results depend on how much recoverable detail the original image contains. Severe motion blur is much harder to fix because the original frame may never have captured enough accurate information to work with.
How can I enhance a photo with AI for free?
Many online AI photo enhancers offer free image processing to get started. Upload the image, select the enhancement option, and compare the result with the original before downloading. Check any limits on output resolution, watermarks, or batch processing if you plan to enhance several photos at once.
Can AI improve the quality of a low-resolution photo?
Yes. AI can improve the visible quality of a low-resolution image by sharpening detail, reducing compression artifacts, and making the image more usable at its current size. If your main goal is to create a much larger output file for print or a marketplace listing, pairing enhancement with an image upscaler gives you better results than either tool alone.
Will AI photo enhancement change my face?
It can happen when the original face is extremely small, blurry, or damaged. When the AI cannot detect enough real detail, it may predict what certain facial features should look like rather than recovering what was actually there. Always compare important portraits with the original before keeping the enhanced version.
Is AI photo enhancement the same as upscaling?
These are two different tools with different goals. Photo enhancement focuses on overall image quality, including blur, noise, lighting, color, and visible detail. Upscaling focuses mainly on increasing image dimensions and output resolution. Applying both in sequence often gives the best result for small or degraded images.
How do I know if a photo is too blurry for AI to fix?
A useful rule is to check whether you can still make out the key details in the original, even if they are soft. If the eyes, text, or product edges are visible but unclear, AI enhancement can usually improve them. If the face is a featureless blur or the text is completely unreadable, the original may not contain enough information for the AI to recover accurately. In those cases, the result may look cleaner but may not reflect what was originally there.